Best House Siding for Hail Damage
Best house siding for hail damage is a crucial consideration for homeowners in hail-prone areas. Understanding the varying resistance levels of different siding materials, from the resilience of fiber cement to the vulnerability of vinyl, is key to protecting your home’s exterior and preventing costly repairs. This guide will explore the impact resistance properties of various siding options, helping you choose the best protection for your investment and peace of mind.
We’ll delve into the specifics of hail damage, examining the effects of hail size and impact velocity on different siding types. Proper installation techniques are equally important, and we’ll provide a step-by-step guide to ensure your siding is installed to maximize its hail resistance. Furthermore, we’ll discuss cost considerations, maintenance requirements, insurance claims, and repair options, providing a comprehensive overview to help you make an informed decision.
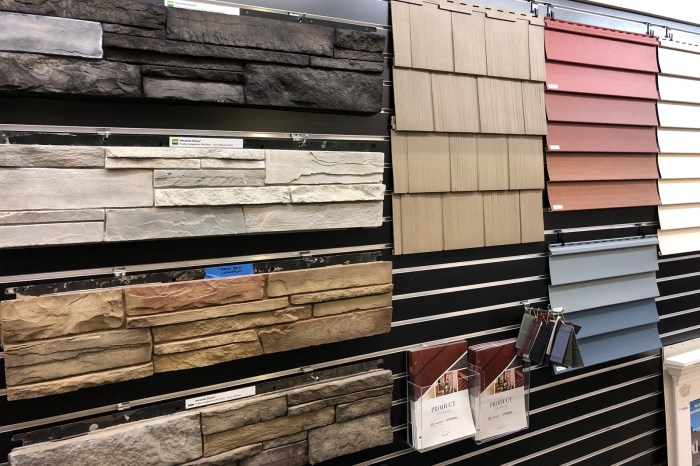
Types of Siding and Hail Resistance

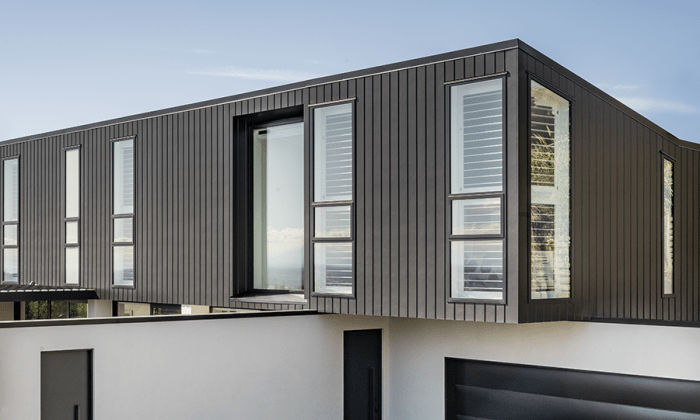
Source: elitesidingroofing.com
Choosing the right siding for your home is a significant investment, especially in areas prone to hailstorms. Understanding the hail resistance of different materials is crucial for protecting your property and minimizing costly repairs. This section will compare the hail resistance of various siding options, helping you make an informed decision.
Siding Material Hail Resistance Comparison
The following table summarizes the hail resistance of common siding materials. It’s important to note that the hail resistance rating is a general guideline and can vary based on factors like product thickness, installation quality, and the severity of the hail.
| Material | Hail Resistance Rating (1-5) | Pros | Cons |
|---|---|---|---|
| Vinyl | 2 | Affordable, low maintenance, variety of colors and styles. | Susceptible to dents and cracks from hail; can become brittle in extreme cold. |
| Fiber Cement | 4 | Durable, fire-resistant, excellent hail resistance, long lifespan. | More expensive than vinyl, requires more maintenance, can be heavy and difficult to install. |
| Aluminum | 3 | Lightweight, durable, resists rust and rot, relatively low maintenance. | Can dent from hail impact, susceptible to scratches, may not offer the same aesthetic appeal as other materials. |
| Wood | 1 | Natural beauty, can be customized, good insulation properties. | Requires significant maintenance, susceptible to rot, insect damage, and hail damage. Needs regular painting or staining. |
| Brick | 5 | Extremely durable, excellent hail resistance, long lifespan, fire-resistant. | Most expensive option, difficult to repair, limited color and style options. |
Impact Resistance Properties of Siding Materials
The impact resistance of siding is largely determined by its material composition and thickness. Fiber cement siding, for instance, boasts high impact resistance due to its composite nature, combining cement, cellulose fibers, and other additives. This creates a strong, dense material that can withstand significant impact forces. Conversely, vinyl siding, while relatively inexpensive, is more susceptible to denting and cracking from hail due to its flexible and less dense structure. Aluminum siding offers moderate impact resistance, but larger hail can still cause dents. Wood siding, owing to its natural composition, is easily damaged by hail. Brick, with its inherent strength and density, provides the highest level of impact resistance.
Factors Influencing Hail Damage Resistance
Several factors beyond the inherent properties of the siding material significantly influence its ability to withstand hail damage.
Thickness plays a crucial role; thicker siding generally offers better protection. The composition of the material, as previously discussed, also directly impacts its resilience. For example, the addition of reinforcing fibers in fiber cement siding enhances its strength. Finally, proper installation is paramount. Improperly installed siding, regardless of its material, is more vulnerable to damage. Seams and joints need to be properly sealed to prevent water penetration and further weakening of the siding. For example, poorly fastened aluminum siding could easily be dislodged by a hailstorm, whereas properly installed siding would remain securely attached.
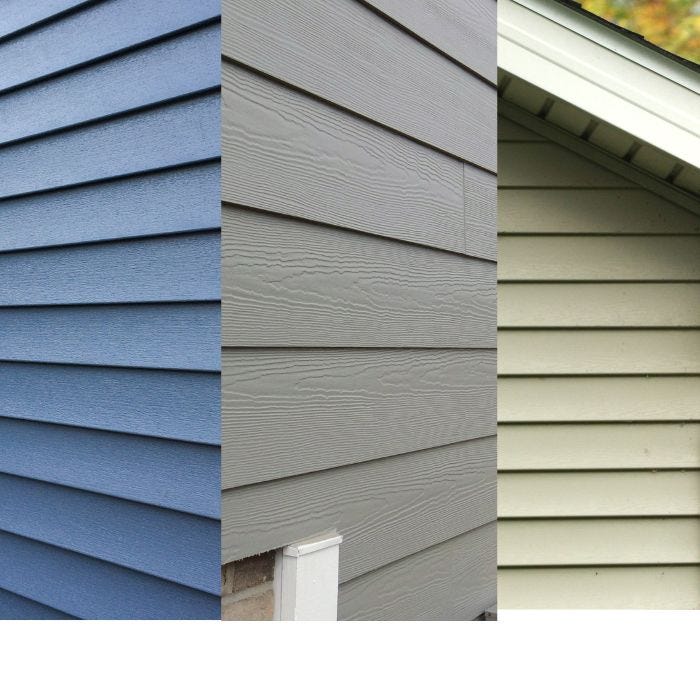
Hail Impact Severity and Siding Damage
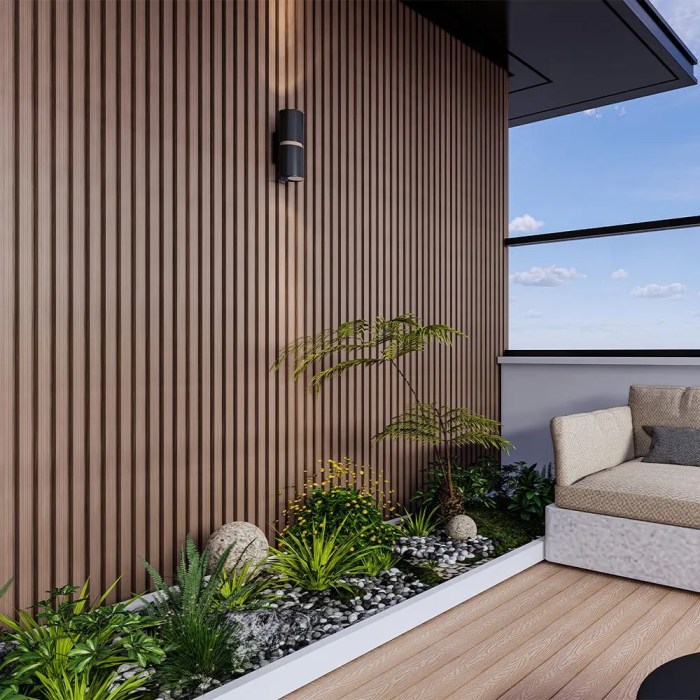
Source: roofingbylandmark.com
Hail damage to siding varies greatly depending on several factors, including the size and velocity of the hailstones, the type of siding material, and the angle of impact. Understanding these factors is crucial for assessing the extent of damage and choosing appropriate repair or replacement strategies. This section will detail the different levels of hail damage and their visual characteristics, as well as the influence of hailstone size and impact speed.
Hailstone Size and Impact Velocity’s Influence on Damage
The size and velocity of hailstones directly correlate with the severity of damage they inflict on siding. Larger hailstones possess greater kinetic energy upon impact, resulting in more significant damage. Similarly, higher impact velocities, often associated with stronger storms, exacerbate the damage potential. A small hailstone (e.g., under 1 inch) impacting at a low velocity might only cause minor cosmetic damage, while a large hailstone (e.g., over 2 inches) striking at high velocity can cause catastrophic failure of the siding.
Levels of Hail Damage to Siding
Hail damage to siding can range from barely noticeable to catastrophic. We can categorize the damage into several levels:
- Minor Dents: These are small, superficial indentations on the siding’s surface. They are typically less than 1/4 inch deep and don’t compromise the structural integrity of the siding. Imagine a small dimple in a smooth surface, barely noticeable unless closely examined under good lighting. The siding’s color and texture remain largely unchanged.
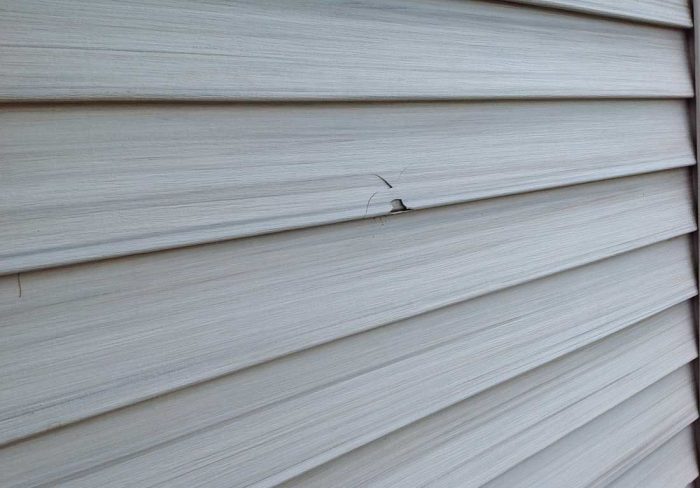
- Cracks: These are hairline fractures in the siding material. They can be visible as thin lines or splits, often radiating from the point of impact. Cracks can weaken the siding and make it more susceptible to further damage from subsequent hail or weather events. Visually, these appear as fine lines, potentially spider-webbing outwards from a central point. The crack may be barely visible or more pronounced, depending on the siding material and the force of the impact.
- Punctures: These are holes or penetrations through the siding material. They are often caused by larger hailstones impacting at high velocity. Punctures compromise the siding’s weather resistance and can allow water to penetrate the building’s exterior. The visual characteristic is a clear hole in the siding, potentially showing the underlying sheathing or insulation. The size of the puncture reflects the size of the hailstone and the force of the impact.
- Complete Destruction: This is the most severe level of damage. It involves significant damage or complete shattering of the siding panels. Large sections of siding may be missing or severely deformed. The visual appearance would be extensive damage, with large portions of siding completely missing or severely compromised. This level of damage necessitates complete siding replacement.
Hailstone Size and Siding Material Suitability
The size of hailstones significantly influences the choice of siding material. Smaller hailstones (under 1 inch) might only cause minor damage to most siding types, while larger hailstones (over 2 inches) can severely damage even the most durable options. For example, vinyl siding is generally not recommended for areas prone to large hail, as it is easily dented and cracked. Fiber cement siding, on the other hand, offers superior hail resistance due to its denser composition. Metal siding is often considered the most hail-resistant option, able to withstand even the most significant impacts. The relationship is not always linear; a very large hailstone could still damage metal siding, albeit less severely than other materials. However, a properly installed and maintained metal siding system will generally exhibit the highest level of resilience.
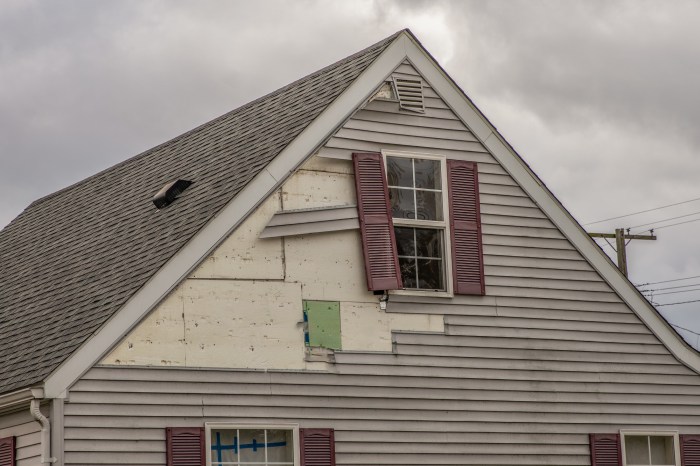
Siding Installation and Hail Protection
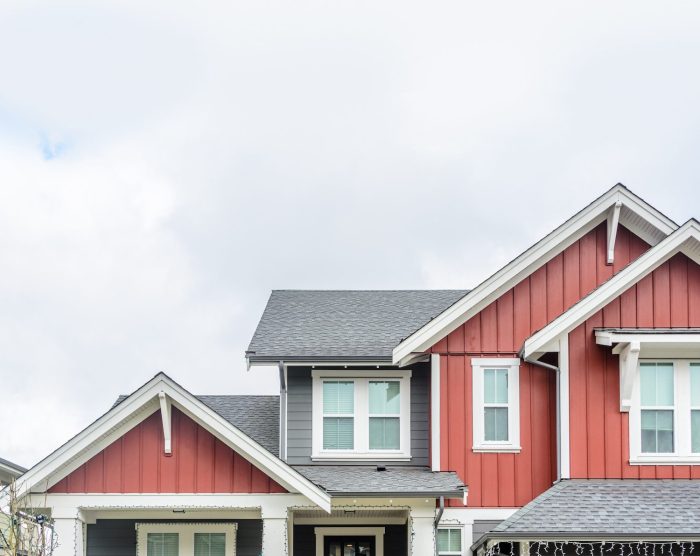
Source: lhkruegerandson.com
Proper siding installation is paramount to ensuring its longevity and effectiveness against hail damage. A poorly installed siding system, regardless of material, will be significantly more vulnerable to hail impact, leading to costly repairs and potential water damage. This section details crucial installation techniques to maximize your siding’s hail resistance.
The key to maximizing hail resistance during siding installation lies in meticulous attention to detail at every stage. From proper fastening to effective sealing, each step contributes to a more resilient exterior.
Installation Techniques for Enhanced Hail Resistance
Following these steps during installation significantly improves the siding’s ability to withstand hail impacts. Careful execution minimizes weak points that hail can exploit.
- Use appropriate fasteners: Employ fasteners specifically designed for your siding material and local climate conditions. These fasteners should be long enough to penetrate the sheathing adequately, providing secure anchoring. Oversized or undersized fasteners compromise the structural integrity.
- Maintain consistent spacing: Follow the manufacturer’s recommended fastener spacing precisely. Incorrect spacing can create stress points that are vulnerable to hail damage. Consistent spacing ensures even load distribution across the siding.
- Proper sheathing preparation: Ensure the underlying sheathing is properly installed, level, and free from defects. Any imperfections in the sheathing will transfer to the siding, creating points of weakness. This is particularly important for areas prone to high winds and hail.
- Careful handling of siding panels: Avoid dropping or damaging siding panels during installation. Scratches or dents weaken the material, making it more susceptible to hail damage. Handle panels with care and use appropriate lifting techniques.
- Overlap siding panels correctly: Overlapping panels according to the manufacturer’s instructions ensures proper weather protection and minimizes gaps where hail can penetrate. Incorrect overlap can lead to water intrusion and structural failure.
Sealing and Securing Siding for Water Damage Prevention
Effective sealing and securing are crucial for preventing water damage following hail impact. Even with hail-resistant siding, water intrusion can cause significant damage if not properly addressed.
- Use high-quality sealant: Apply a high-quality, weather-resistant sealant to all joints and seams. This sealant acts as a barrier, preventing water from penetrating behind the siding. Ensure compatibility with your siding material.
- Inspect and repair damaged areas promptly: After a hailstorm, thoroughly inspect your siding for any damage, including cracks, dents, or missing pieces. Repair or replace damaged sections immediately to prevent water intrusion. Ignoring small damages can lead to larger, more expensive problems later.
- Proper flashing installation: Install flashing around windows, doors, and other penetrations in the wall to divert water away from these vulnerable areas. Flashing provides an extra layer of protection against water damage, even after hail impact.
- Regular maintenance: Regularly inspect your siding for any signs of damage or deterioration. Addressing minor issues promptly prevents them from escalating into larger problems. This proactive approach minimizes the risk of significant damage from future hailstorms.
Cost Considerations and Maintenance
Choosing the right siding not only protects your home from hail but also significantly impacts your budget over time. The initial purchase price is just one factor; ongoing maintenance and the siding’s lifespan play crucial roles in determining the overall cost-effectiveness of your investment. Understanding these aspects will help you make an informed decision that aligns with your financial goals and long-term homeownership plan.
Different siding materials vary greatly in their initial cost, annual maintenance needs, and longevity. While a more expensive, durable option might seem daunting upfront, it can ultimately save you money on repairs and replacements in the long run. Let’s explore this in more detail.
Siding Material Cost Comparison
The following table compares the initial cost, annual maintenance, and lifespan of several common hail-resistant siding materials. Note that prices can vary significantly based on factors like location, installer, and material quality. These figures represent average estimates and should be verified with local contractors for accurate pricing in your area.
| Material | Initial Cost (per sq ft) | Annual Maintenance Cost (per sq ft) | Lifespan (Years) |
|---|---|---|---|
| Fiber Cement | $6-$12 | $0.10-$0.25 | 50-75 |
| Vinyl | $3-$7 | $0.05-$0.15 | 20-30 |
| Aluminum | $4-$9 | $0.05-$0.10 | 30-50 |
| Steel | $7-$15 | $0.05-$0.10 | 40-60 |
Cost-Effectiveness of Durable Siding
Investing in higher-quality, more durable siding, such as fiber cement or steel, can significantly reduce long-term costs. While the initial investment is higher, the extended lifespan and lower maintenance requirements often outweigh the upfront expense. For example, a home requiring vinyl siding replacement every 20 years will incur significantly more costs over a 50-year period compared to a home sided with fiber cement, which may only need replacement once or twice in the same timeframe. This is especially relevant in hail-prone areas where damage can be frequent and costly to repair.
Twenty-Year Cost Comparison Chart
This chart illustrates the total cost of ownership for different siding types over a 20-year period, considering initial cost, annual maintenance, and potential replacement costs. It demonstrates how seemingly small differences in annual maintenance can accumulate over time, significantly impacting the overall cost. These figures are estimations and can vary based on specific circumstances.
| Material | Initial Cost (2000 sq ft home) | Total Maintenance (20 years) | Replacement Cost (if needed) | Total 20-Year Cost |
|---|---|---|---|---|
| Fiber Cement | $12000-$24000 | $400-$1000 | $0 | $12400-$25000 |
| Vinyl | $6000-$14000 | $200-$600 | $6000-$14000 (Replacement at 20 years) | $12200-$34600 |
| Aluminum | $8000-$18000 | $200-$400 | $0 | $8200-$18400 |
| Steel | $14000-$30000 | $200-$400 | $0 | $14200-$30400 |
Insurance and Hail Damage Claims
Homeowner’s insurance plays a crucial role in protecting your property, including your home’s siding, from unexpected damage like hailstorms. Most standard homeowner’s insurance policies include coverage for hail damage, but the specifics depend on your policy and the extent of the damage. Understanding your policy and the claims process is vital for a smooth and successful repair.
Your insurance policy Artikels the extent of your coverage for hail damage. It specifies your deductible—the amount you pay out-of-pocket before your insurance coverage kicks in—and the types of damage covered. Some policies might have limitations on the types of siding materials covered or the total amount paid for repairs. Reviewing your policy carefully before a hailstorm is advisable to understand what is and isn’t covered. It’s important to note that you will likely need to provide documentation of the damage and may be subject to an inspection by your insurance company.
Filing a Hail Damage Claim
Filing a hail damage claim typically involves contacting your insurance provider as soon as possible after the hailstorm. You’ll need to provide them with details about the damage, including the date and time of the storm, and the extent of the damage to your siding. They will likely schedule an inspection by an adjuster to assess the damage and determine the cost of repairs. The adjuster will take photos and may take samples of the damaged siding to determine the cause of the damage and if it is covered by your policy. Be prepared to provide supporting documentation. After the inspection, your insurer will determine the amount they will cover based on your policy and the adjuster’s assessment. They will then Artikel the next steps, which might include selecting a contractor from their approved list or providing authorization to use your own contractor.
Documenting Hail Damage
Thorough documentation is crucial for a successful insurance claim. This helps to support your claim and ensures you receive fair compensation for the repairs.
Here are some key steps for documenting hail damage:
- Take photographs and videos: Capture images and videos of the damaged siding from multiple angles. Include close-up shots of individual dents and impact points, as well as wider shots showing the overall extent of the damage. Document any damaged areas that are difficult to see from the ground using a drone or by climbing a ladder. Time-stamped photos and videos are especially helpful.
- Create a detailed inventory: List all damaged areas, noting the type and extent of damage. Include measurements of the affected areas. Be as specific as possible, for example, “Hail damage to western exterior wall, 15 square feet of vinyl siding, multiple dents and punctures.”
- Keep records of all communication: Maintain copies of all correspondence with your insurance company, including emails, letters, and phone call notes. This documentation serves as a record of your interactions and the progress of your claim.
- Obtain multiple estimates for repairs: Get at least three estimates from reputable contractors for the cost of repairing or replacing your damaged siding. This helps demonstrate the reasonableness of the repair costs.
- Report the damage promptly: Contact your insurance company as soon as reasonably possible after the hailstorm. Prompt reporting helps prevent delays in processing your claim.
Repair and Replacement Options
Hail damage to your siding can range from minor blemishes to extensive destruction, necessitating various repair and replacement strategies. The best approach depends on the severity of the damage, the type of siding, and your budget. Choosing the right method ensures both aesthetic appeal and long-term protection for your home.
Repair Methods for Hail-Damaged Siding
Several methods exist for repairing hail-damaged siding, each appropriate for different levels of damage. Patching is suitable for minor dents and imperfections, while replacing individual panels addresses more significant damage. Complete replacement is necessary for widespread or severe damage. The choice hinges on the extent of the hail impact and the cost-effectiveness of each option.
Patching Minor Hail Damage
Patching is a cost-effective solution for minor dents and scratches. This method involves carefully filling the damaged area with a suitable filler, sanding it smooth, and then painting to match the existing siding color. While patching is quick and inexpensive, it’s only effective for superficial damage and may not restore the original texture perfectly. It’s crucial to use a high-quality filler designed for exterior use to ensure durability and weather resistance.
Replacing Individual Siding Panels
Replacing individual panels is ideal for moderate hail damage where several panels show significant dents or cracks. This approach involves removing the damaged panels, carefully measuring the replacements, and securing the new panels using appropriate fasteners. This method maintains the overall aesthetic consistency of your siding while addressing the specific areas of damage. It’s more involved than patching but less costly than a full replacement.
Replacing a Damaged Siding Panel: A Step-by-Step Guide, Best house siding for hail damage
Replacing a damaged siding panel requires careful attention to detail to ensure a seamless and durable repair. Here’s a step-by-step guide:
- Preparation: Gather necessary tools (measuring tape, pry bar, hammer, nails/screws, new siding panel, caulk, paint). Turn off power to any exterior outlets near the work area. Protect surrounding areas with drop cloths.
- Removal of Damaged Panel: Carefully pry the damaged panel away from the underlying structure, starting at one corner. Work slowly and methodically to avoid damaging adjacent panels. Take note of the panel’s position and any fastening techniques used.
- Inspection and Preparation: Inspect the underlying structure for any damage. Repair any damaged sheathing or framing as needed. Clean the area thoroughly to remove debris.
- Installation of New Panel: Position the new panel, ensuring proper alignment and overlap with adjacent panels. Secure the panel using nails or screws, following the manufacturer’s instructions and mimicking the original fastening pattern.
- Caulking and Finishing: Apply a bead of exterior-grade caulk along the edges of the new panel to seal it against moisture. If necessary, touch up the paint to match the surrounding siding.
Complete Siding Replacement
For extensive hail damage affecting a large portion of the siding, a complete replacement is the most effective solution. This involves removing all damaged siding, inspecting the underlying structure for damage, and installing entirely new siding. While more expensive, this approach ensures a uniform, long-lasting, and aesthetically pleasing result. Consider upgrading to a more hail-resistant siding material during a complete replacement to further protect your investment.
Wrap-Up
Choosing the right house siding is a significant investment, especially in areas prone to hail. By understanding the strengths and weaknesses of various materials, factoring in installation quality, and considering long-term costs, you can significantly reduce the risk of costly hail damage. This guide has equipped you with the knowledge to select the best siding for your home, ensuring both its protection and your financial security. Remember to always consult with professionals for accurate assessments and expert installation.
FAQ Overview: Best House Siding For Hail Damage
What is the average lifespan of hail-resistant siding?
Lifespans vary depending on the material and quality of installation, but generally range from 20 to 50 years.
Can I repair minor hail damage myself?
Minor dents might be repairable with fillers and paint, but significant damage requires professional assessment and repair.
Does my homeowner’s insurance cover hail damage?
Most homeowner’s insurance policies cover hail damage, but coverage specifics vary; check your policy details.
How often should I inspect my siding for hail damage?
Regular inspections, especially after hailstorms, are recommended. Look for dents, cracks, or missing pieces.
What is the best way to document hail damage for insurance claims?
Take clear photos of the damage, including the hailstone size if possible, and keep detailed records of the event and repair costs.