Metal Roof Siding Trim A Complete Guide
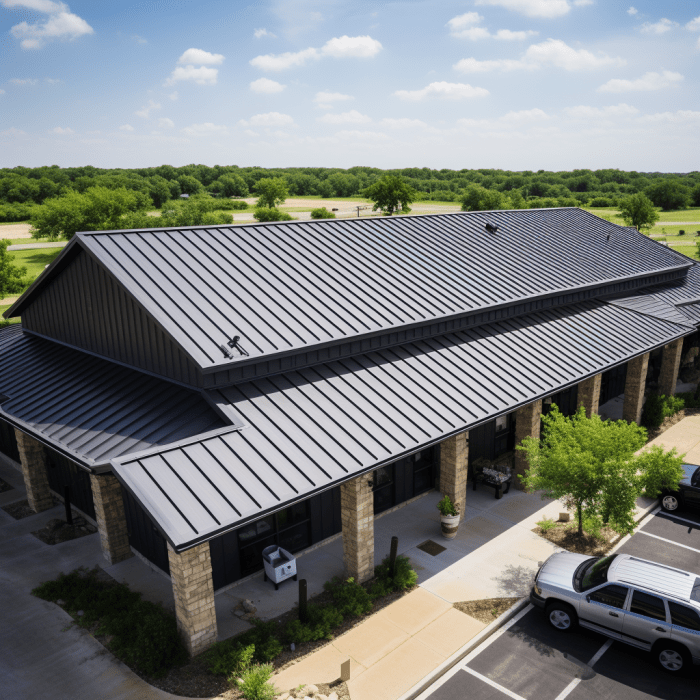
Metal roof siding trim significantly enhances a home’s curb appeal and protects its structure. This guide delves into the diverse world of metal roof siding trim, exploring the various materials, installation techniques, maintenance strategies, design considerations, and cost implications. We’ll cover everything from choosing the right type of trim to ensuring a watertight and long-lasting installation, helping you make informed decisions for your home improvement project.
From the selection of durable materials like aluminum, galvanized steel, or zinc, to the aesthetic choices of painted, powder-coated, or textured finishes, we’ll explore the myriad options available. We’ll also detail the crucial steps involved in installation, emphasizing proper measurements, cutting techniques, and the importance of watertight seals. Finally, we’ll provide insights into cost estimation and budgeting to help you plan your project effectively.
Types of Metal Roof Siding Trim
Choosing the right metal roof siding trim is crucial for both the aesthetic appeal and the longevity of your roof. The trim protects vulnerable edges from the elements, preventing water damage and extending the life of your roofing system. Several factors influence the selection process, including material, finish, and budget.
Metal Trim Materials
Metal roof siding trim is typically manufactured from aluminum, galvanized steel, or zinc. Each material offers a unique balance of durability, cost, and aesthetic qualities. Aluminum is lightweight, corrosion-resistant, and relatively inexpensive, making it a popular choice for many homeowners. Galvanized steel provides superior strength and durability, but it’s heavier and may be more susceptible to rust over time if the protective zinc coating is damaged. Zinc, while more expensive than aluminum, offers exceptional corrosion resistance and a distinctive, naturally weathering patina.
Durability and Lifespan of Metal Trim Materials
The lifespan of metal roof siding trim varies depending on the material and environmental conditions. Aluminum trim, with proper installation and maintenance, can last for several decades, often exceeding 25 years. Galvanized steel, while stronger, can be prone to rust in harsh coastal environments or areas with high humidity. Regular inspection and repainting can extend its lifespan, but it generally falls within a similar timeframe as aluminum. Zinc, thanks to its self-healing properties, boasts an exceptionally long lifespan, often lasting 50 years or more, developing a beautiful, protective patina over time.
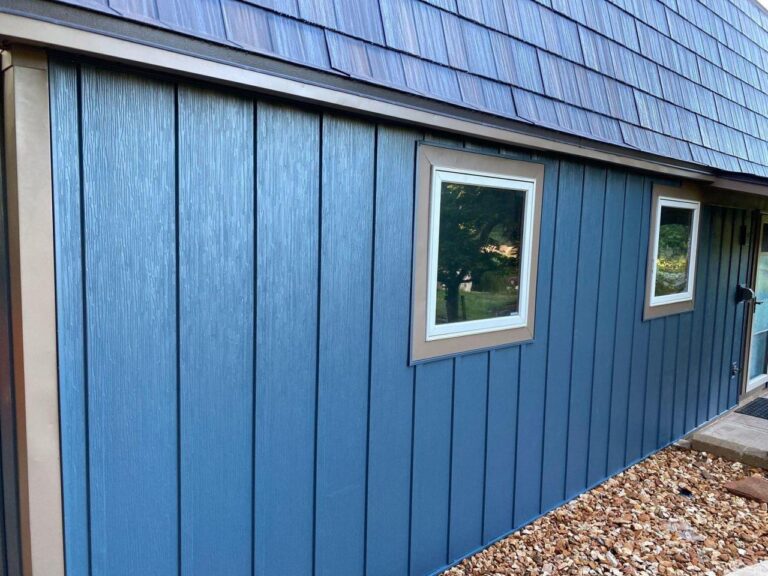
Aesthetic Differences in Metal Trim Finishes
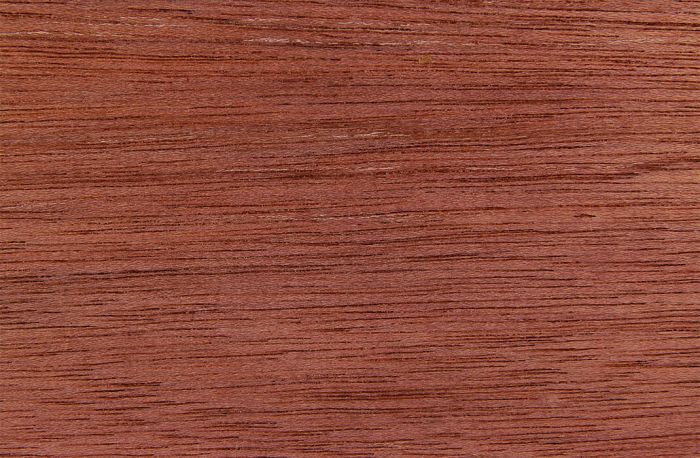
The finish of your metal trim significantly impacts its appearance. Painted finishes offer a wide array of colors to match your home’s style, but they require periodic repainting to maintain their appearance and protect against corrosion. Powder-coated finishes are more durable and resistant to chipping and fading, providing a longer-lasting, vibrant color. Textured finishes, such as those that mimic wood grain, can add a unique visual appeal, often offering better camouflage against dirt and scratches.
Comparison of Metal Trim Types
| Trim Material | Cost | Maintenance | Longevity (Years) |
|---|---|---|---|
| Aluminum | Low to Moderate | Low (periodic cleaning) | 25+ |
| Galvanized Steel | Moderate | Moderate (periodic inspection and repainting) | 20-30 |
| Zinc | High | Low (minimal maintenance) | 50+ |
Installation Methods for Metal Roof Siding Trim
Installing metal roof siding trim is crucial for a long-lasting, watertight roof. Proper installation techniques ensure the trim protects your roof from the elements and enhances its aesthetic appeal. This section details the steps involved in installing common trim pieces, focusing on accurate measurements, proper cutting techniques, and best practices for creating a secure seal.
J-Channel Installation
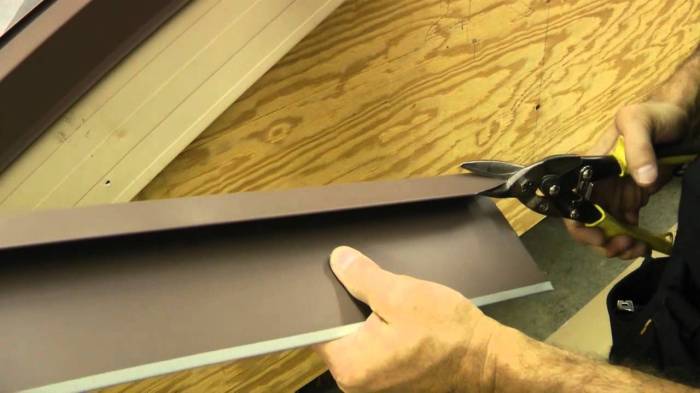
J-channel is typically installed along the edges of the roof to provide a neat finish and a channel for the roofing material to slip into. Accurate measurement is paramount to avoid gaps or overlaps. Begin by measuring the length of each section required. Use tin snips or metal shears to cut the J-channel to the appropriate length, ensuring a clean, square cut to prevent sharp edges. Secure the J-channel to the fascia board or rafter using appropriate fasteners, ensuring consistent spacing and alignment. Overlap the ends of adjacent J-channel pieces by at least 2 inches and seal the joints with a high-quality sealant to create a watertight seal.
Drip Edge Installation, Metal roof siding trim
Drip edge is installed at the eaves and rakes to divert water away from the roof and the fascia. Before installation, ensure the roof sheathing is clean and free from debris. Start at one end of the roof and begin to install the drip edge, ensuring proper overlap between pieces (typically 2-4 inches). Secure the drip edge with appropriate fasteners, spacing them evenly along the length. Pay close attention to sealing any gaps or joints with a weatherproof sealant to prevent water penetration. Remember to maintain consistent alignment throughout the installation process.
Corner Trim Installation
Corner trim is used to neatly finish the corners of the roof. Measure the length of each corner section carefully. Use tin snips or metal shears to cut the trim to the exact length required, ensuring a precise fit. Apply a bead of sealant to the back of the trim before installation. Position the trim pieces at the corners, ensuring a tight fit and alignment with the adjacent roofing materials. Secure the trim with fasteners, paying close attention to sealing any gaps or joints to prevent leaks.
Best Practices for Watertight Seals and Leak Prevention
Using a high-quality sealant specifically designed for metal roofing is crucial for preventing leaks. Apply sealant liberally to all joints and overlaps, ensuring complete coverage. Use fasteners appropriate for the metal roofing material and the climate conditions. Avoid over-tightening fasteners, as this can damage the trim and compromise its watertightness. Regular inspections after installation and after severe weather events are highly recommended to identify and address any potential issues early on.
Visual Guide: Trim Placement and Overlap
Maintenance and Repair of Metal Roof Siding Trim

Source: pioneermetalsga.com
Proper maintenance and timely repairs are crucial for extending the lifespan of your metal roof siding trim and maintaining its aesthetic appeal. Neglecting these aspects can lead to accelerated deterioration, costly repairs, and potential water damage to your home. Regular cleaning and inspections, coupled with prompt attention to any damage, will ensure your trim remains a protective and attractive feature of your home for years to come.
Routine Maintenance Tasks
Regular cleaning and inspection are the cornerstones of effective metal roof siding trim maintenance. Dirt, debris, and leaves can accumulate over time, trapping moisture and accelerating corrosion. Visual inspections allow for early detection of problems, preventing minor issues from escalating into major repairs.
- Cleaning: Use a soft-bristled brush and a mild detergent solution to remove dirt and debris. Rinse thoroughly with water, ensuring all soap residue is removed. Avoid abrasive cleaners or high-pressure washers, which can damage the trim’s finish.
- Inspection: At least twice a year, conduct a thorough visual inspection of all trim pieces. Check for loose fasteners, dents, scratches, rust, or signs of sealant failure. Pay particular attention to areas exposed to harsh weather conditions.
Repairing Common Damage
Addressing damage promptly is vital in preventing further deterioration. Minor dents and scratches can often be repaired with relative ease, while rust requires more immediate attention.
- Dents: Small dents can sometimes be carefully pushed out from the back using a blunt object. For larger dents, a professional may be needed to restore the trim’s shape.
- Scratches: Minor scratches can be touched up with a suitable metal paint that matches the trim’s color. For deeper scratches, a more extensive repair, possibly including replacement of the damaged section, may be necessary.
- Rust: Rust should be addressed immediately. Remove all loose rust using a wire brush. Apply a rust converter to neutralize the remaining rust and then prime and paint the affected area with a rust-resistant paint.
Protective Coatings and Sealants
Applying protective coatings and sealants can significantly extend the life of your metal roof siding trim. These products create a barrier against the elements, preventing corrosion and damage.
- Protective Coatings: High-quality exterior-grade paints specifically designed for metal surfaces offer excellent protection against UV radiation, moisture, and corrosion. Choose a paint that is durable and resistant to fading.
- Sealants: Sealants are particularly important around seams and joints, preventing water intrusion. Use a high-quality sealant that is compatible with the metal and the existing coating. Reapply sealant as needed, typically every few years, depending on the product and weather conditions.
Regular Maintenance Checklist
Regular maintenance is key to preventing problems and extending the life of your metal roof siding trim. This checklist will help you stay on top of things:
- Clean the trim twice a year using a soft brush and mild detergent.
- Inspect the trim for damage (dents, scratches, rust, loose fasteners) twice a year.
- Repair any damage promptly, addressing rust immediately.
- Apply touch-up paint as needed to maintain the trim’s appearance and protect against corrosion.
- Reapply sealant around seams and joints every few years, as needed.
- Consider professional inspection and maintenance every 5-7 years for a thorough assessment.
Design Considerations for Metal Roof Siding Trim

Source: metalpanelsinc.com
Choosing the right metal roof siding trim significantly impacts your home’s curb appeal and overall aesthetic. Careful consideration of style, color, and finish ensures a cohesive and visually pleasing result, complementing your home’s architecture and enhancing its details. This section explores design elements to help you make informed decisions.
Metal Roof Siding Trim Styles and Profiles
A variety of styles and profiles are available for metal roof siding trim, each offering a unique visual character. Common profiles include J-channel, Z-flashing, rake trim, and corner trim. J-channel, for instance, provides a clean, simple finish along edges, while Z-flashing offers a more robust and weather-resistant solution for intersections. Rake trim neatly finishes the edges of the roof, and corner trim protects and enhances the visual appeal of roof corners. The choice depends on the specific application and desired aesthetic. Consider the overall style of your home – a modern home might benefit from sleek, minimalist trim profiles, while a traditional home might look better with more ornate details.
Visual Impact of Trim Colors and Finishes
The color and finish of your metal roof siding trim can dramatically alter the overall look of your home. Darker colors, such as dark brown or black, can create a dramatic and sophisticated appearance, especially against lighter-colored siding. Lighter colors, like beige or white, offer a cleaner, more contemporary feel. The finish also plays a role; a matte finish provides a subtle, understated look, while a high-gloss finish adds a touch of shine and visual interest. For example, a dark gray matte finish on a steeply pitched roof would complement a modern farmhouse style, whereas a bright white glossy finish might be better suited for a coastal style home. Consider the existing colors on your home’s exterior, including the roof itself, to ensure a harmonious color palette.
Choosing Trim to Complement Home Aesthetics
Selecting trim that complements your home’s overall aesthetic is crucial. Consider the architectural style of your home. A Victorian home might benefit from more decorative trim with intricate details, while a contemporary home would look better with simpler, cleaner lines. The trim should enhance, not clash with, the existing architectural features. For example, matching the trim color to your gutters or downspouts can create a cohesive and visually appealing look. The material of your siding should also be considered. Metal trim generally pairs well with other metal siding materials, but can also complement other materials such as vinyl or wood.
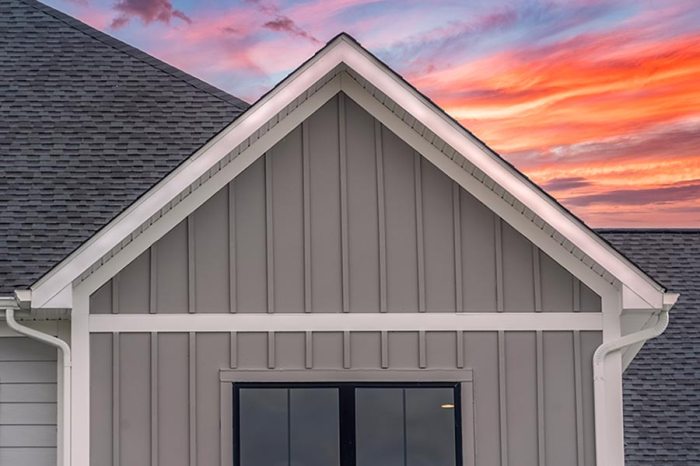
Enhancing Architectural Details with Metal Roof Siding Trim
Metal roof siding trim can be used effectively to highlight and enhance existing architectural details.
Using contrasting colors on trim to accentuate dormers or gables can add visual interest and draw attention to these architectural features. For instance, using a darker trim color on a lighter-colored roof can create a striking contrast and emphasize the roofline.
Adding decorative trim pieces, such as scrolls or finials, can add a touch of elegance and sophistication to a home’s exterior. This is particularly effective on homes with more traditional architectural styles.
Integrating the trim seamlessly with other exterior features, such as windows or doors, creates a unified and polished look. Consider using the same color or finish on the trim as the window frames or door casings.
Cost and Budgeting for Metal Roof Siding Trim
Planning the budget for your metal roof siding trim is crucial for a successful project. Understanding the various cost factors involved will help you avoid unexpected expenses and ensure your project stays within your financial limits. This section will break down the costs, identify influential factors, and provide a sample budget to guide your planning.
Cost Breakdown of Metal Roof Siding Trim
The cost of metal roof siding trim encompasses material costs and labor costs. Material costs vary depending on the type of metal (aluminum, steel, zinc, copper), its gauge (thickness), finish (painted, powder-coated), and the length and quantity needed. Labor costs depend on the complexity of the installation, the installer’s experience, and the prevailing labor rates in your region. Additionally, you should factor in the cost of any necessary tools or equipment if you’re not hiring a professional.
Factors Influencing Overall Cost
Several factors significantly impact the final cost. The type of metal chosen is a primary driver; copper, for example, is considerably more expensive than aluminum. The quantity needed, determined by the size and complexity of your roofline, directly influences material costs. Labor costs are influenced by the accessibility of the roof, the intricacy of the trim design, and the prevailing hourly rates for skilled roofers in your area. Hidden expenses, such as unforeseen damage requiring extra materials or adjustments to the installation plan, should also be considered. Finally, permits and inspections, if required by your local building codes, will add to the overall project cost.
Estimating Total Project Cost
Accurately estimating the total cost requires a multi-step approach. First, measure the length of all areas requiring trim. Next, determine the material costs per linear foot or square foot based on quotes from suppliers. Obtain quotes from several roofing contractors to compare labor costs. Remember to inquire about their experience with metal roof trim installation and request detailed breakdowns of their quotes. Add a contingency buffer of 10-20% to account for unforeseen expenses. This buffer helps prevent cost overruns due to unexpected issues during the installation process. For instance, discovering rotted wood under existing trim might necessitate additional repairs and material.
Sample Budget for Metal Roof Siding Trim Installation
The following table provides a sample budget for a typical installation. Remember that these are estimates, and your actual costs may vary depending on your specific project needs and location.
| Cost Component | Quantity/Description | Unit Cost | Total Cost |
|---|---|---|---|
| Materials (Aluminum Trim) | 150 linear feet | $5/linear foot | $750 |
| Labor | 2 days work | $500/day | $1000 |
| Permits & Inspections | 1 set of permits | $100 | $100 |
| Contingency (15%) | $262.50 | ||
| Total Estimated Cost | $2112.50 |
Conclusive Thoughts
Source: ytimg.com
Ultimately, selecting and installing the right metal roof siding trim is a crucial step in protecting your home and enhancing its beauty. By understanding the different materials, installation methods, maintenance requirements, and design considerations, you can ensure a long-lasting, visually appealing, and structurally sound roofline. Remember that proper installation and regular maintenance are key to maximizing the lifespan and aesthetic value of your metal roof siding trim. With careful planning and attention to detail, your home’s exterior will remain protected and stylish for years to come.
FAQ Explained
What is the average lifespan of metal roof siding trim?
The lifespan varies depending on the material and finish, but generally ranges from 20 to 50 years with proper maintenance.
Can I install metal roof siding trim myself?
While possible for some types of trim, professional installation is often recommended for complex roofs or to ensure a watertight seal.
How often should I clean my metal roof siding trim?
At least once a year, preferably in the spring or fall, to remove debris and prevent buildup.
What are some common signs of damage to metal roof siding trim?
Rust, dents, scratches, peeling paint, and loose or missing pieces are all signs of damage.
What type of sealant is best for metal roof siding trim?
Silicone-based or butyl-based sealants are commonly used and provide excellent weather resistance.